
Selling Prints online with Print on Demand – The Complete Guide
This post was updated on November 26, 2025
Selling prints online involves various challenges beyond just creating and showcasing your artwork. Managing inventory, handling invoices, and ensuring smooth fulfillment are crucial aspects when selling prints online.
Thats where print-on-demand comes in handy!.
What is Print on Demand and why is it needed?
Print on demand (POD)
POD is a revolutionary solution in the world of publishing and merchandise that addresses the evolving needs of businesses and individuals. One of the primary reasons why print on demand is essential lies in its ability to minimize financial risks and inventory management challenges when selling prints.
What problems does POD solve
Additionally, Traditional printing methods often require large upfront investments and the production of a fixed quantity of items, leading to excess stock or shortages. POD, on the other hand, allows for the creation of customized and on-demand products.
Moreover, print on demand facilitates a more sustainable and eco-friendly approach to manufacturing, as items are produced only when there is a demand, reducing the environmental impact associated with overproduction and excess inventory.
Well-known Print-On-Demand (POD) providers
When contemplating selling prints online, several reputable Print-On-Demand (POD) vendors stand out as reliable options.
The following list provides a glimpse of these vendors’ services. While it is not exhaustive, it offers insights into the range of services they provide which are worth considering when selling prints online.
- Printful: a widely used POD service known for its integration with various e-commerce platforms. They offer a range of customizable products, including apparel, accessories, and home goods.
- Printify: connects merchants with a network of printing partners worldwide. It allows users to create and sell custom products through various e-commerce platforms.
- Redbubble: an online marketplace that enables artists to sell their designs on a variety of products, including clothing, home decor, and accessories.
- Merch by Amazon: Amazon’s Merch program allows designers to create and sell custom-branded products on the Amazon marketplace.
- Prodigi: a POD service which integrates with various e-commerce platforms. They offer a range of customizable products, including canvas prints, posters, and home goods.
* Keep in mind that this is not an exclusive selection, and exploring additional options is always encouraged in the realm of selling prints online.
We will cover most of the well-known POD providers in seperate posts, and we will focus on Prodigi in this post. This guide provides a roadmap to how to make the most out of Prodigi when selling prints online.
“Don’t work harder, work smarter.”
– Allen F. Morgenstern
What is Prodigi?
Prodigi empowers artists to place orders for personalized products featuring their artwork. They offer a diverse range of products, including canvas prints, T-shirt prints, and more.
The platform handles the following services on behalf of sellers:
- Labeling
- Shipping
- Order tracking
- Connecting to famous online stores builders like Etsy, Wix and SquareSpace.
Now, let’s explore some of the impressive services Prodigi provides.
View and compare shipping costs worldwide on Prodigi
When exploring products to present to your customers, it is essential to incorporate this step into your due diligence. Given that Prodigi operates from various global facilities, it is important to consider the shipping costs to your customers’ locations and factor them into the pricing accordingly.
1- View the products list
After creating an account on Prodigi, go to the Dashboard and click on “View products” to browse a list of all available products on the platform.
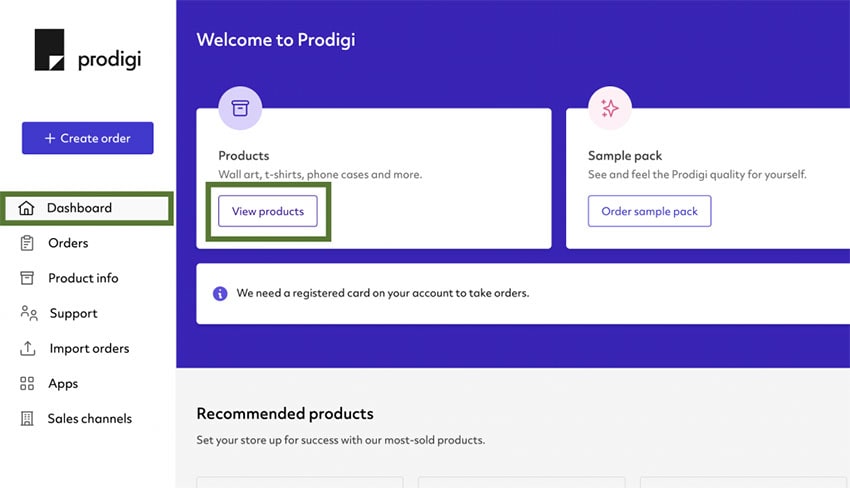
This should display a wide variety of products to choose from.

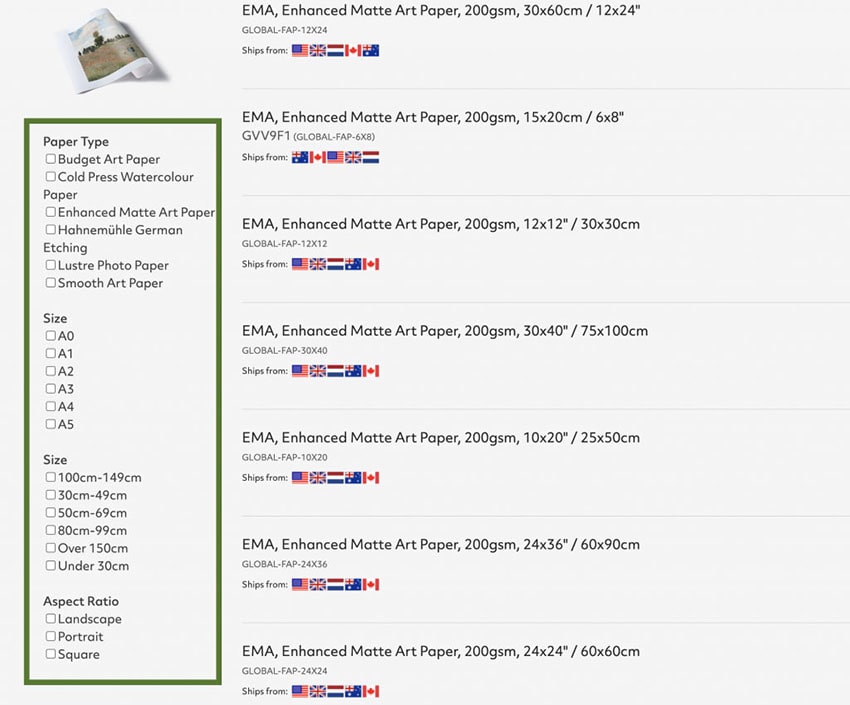
2- Select desired product
You can choose the desired product and you will be prompted to the product’s page where you will see a list of options allowing you to compare prices of shipping locations and add to basket.

This should give you an idea of how much you can charge for shipping before hand. This view also has some relative filters to help you find the right product.
Placing an order on Prodigi
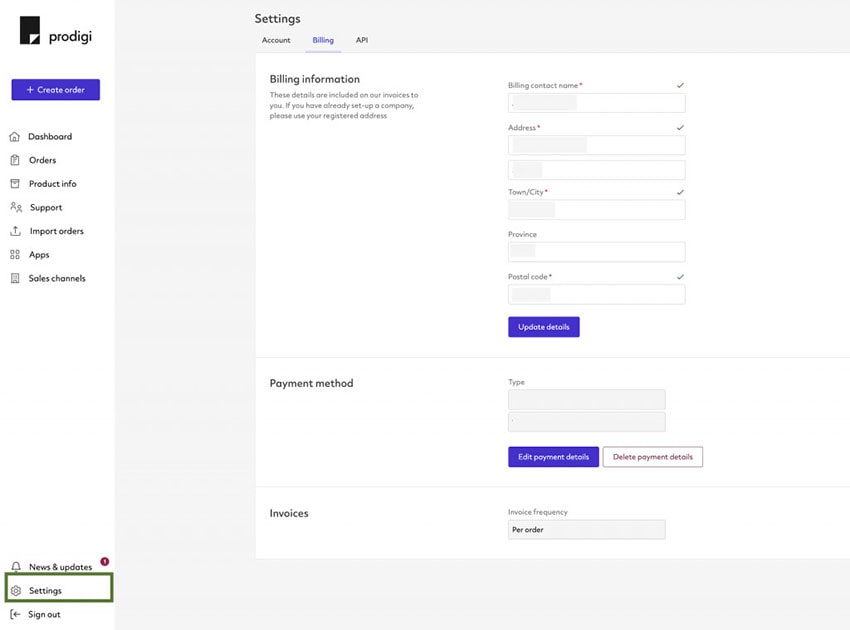
1- Add billing information
Before placing any orders you will need to set up your payment details. To do that, go to the settings page by clicking on “settings” at the bottom right side on the Navigation bar.
Now with that out of the way, we can place orders.
2- Visit the orders page
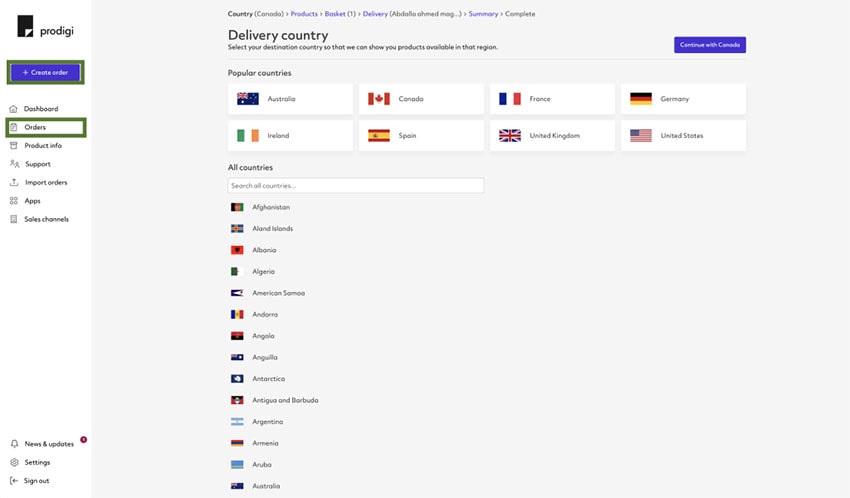
From the navigation sidebar, click on “Orders” to view the orders page, then click on “Create Order”, and proceed to designate your customer’s delivery location.
Importantly, this step holds significance, as Prodigi relies on this information to decide the shipping facility from which your order will be dispatched.
3- Select the product
Then choose the product, you can use the dropdown menu to find the right category or start typing the product name or SKU.

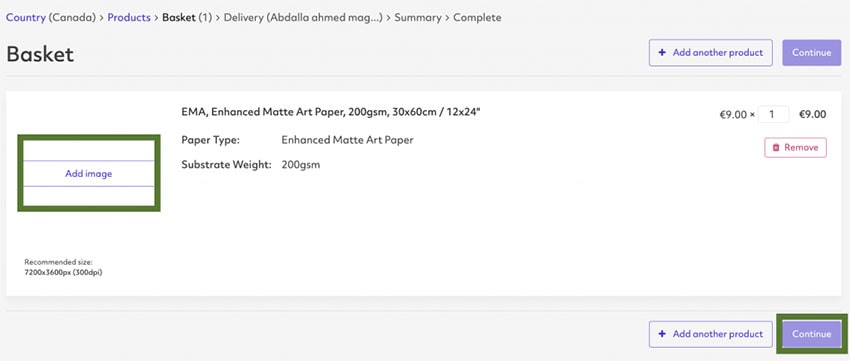
4- Upload the artwork
Once you have selected the right product, click on “Add to basket”. It will take you to the basket page where you can upload the artwork, which will be printed on the chosen product.
*You can add multiple products to your basket and checkout after uploading artwork to each product.
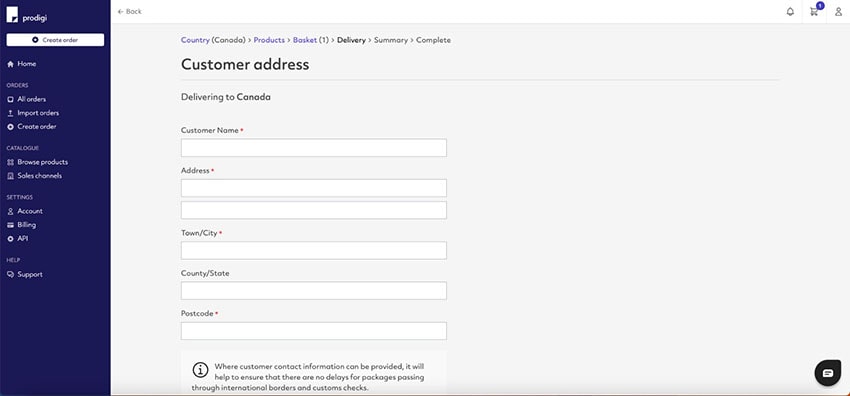
5- Enter the customer address
After clicking on “Continue”, you will be taken to the Customer address view where you will need to enter your customer’s address then click on “Continue” to be taken to the next step.
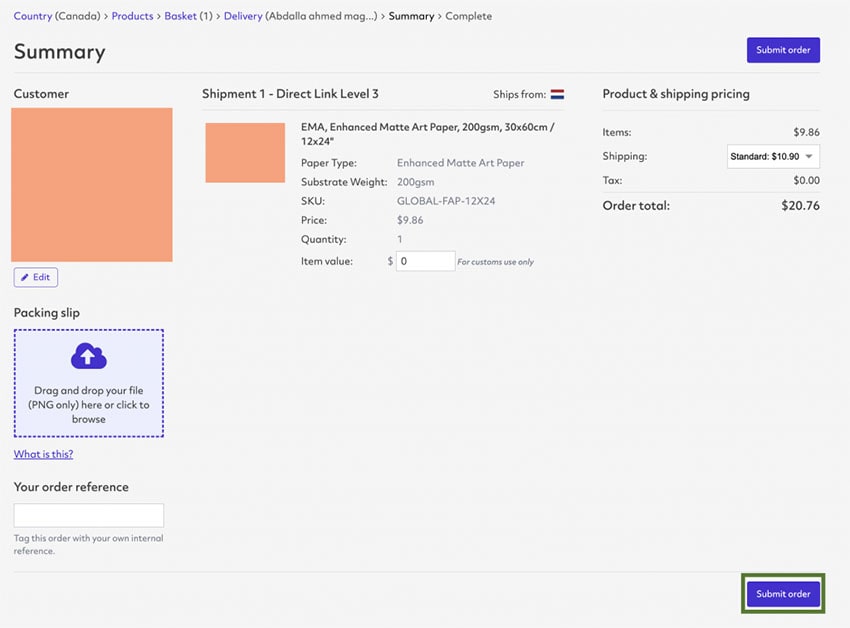
6- Review the order summary page
The order summary page will show you comprehensive details of your order, including your customer’s information (name and address), the product specifics, including the artwork, shipping pricing, and the shipping location.
Additionally, your order reference (internal reference) will be provided. If applicable, you have the option to upload a packing slip for certain products shipped from USA, UK, and EU locations.
It’s important to note, according to Prodigi’s documentation, they do not guarantee sending the packing slip with every shipment, and it is not recommended to use it for invoicing purposes.
Please review all the details in the order summary carefully before clicking “Submit Order.” Once submitted, your order is now trackable on the Orders page.
3- Connect a sales channel and sell art through it
Prodigi allows users to connect with other platforms and have orders flow automatically into Prodigi for fulfilment. You can always place orders online or via their fully featured print API and start selling prints online.
* Remember that specific steps may vary based on the sales channel and Prodigi’s current integrations. Always refer to the documentation provided by both Prodigi and your chosen sales channel for the most accurate and up-to-date instructions.
The following are the steps to connect to a sales channel:
1- Select “Sales channels” from the navigation sidebar
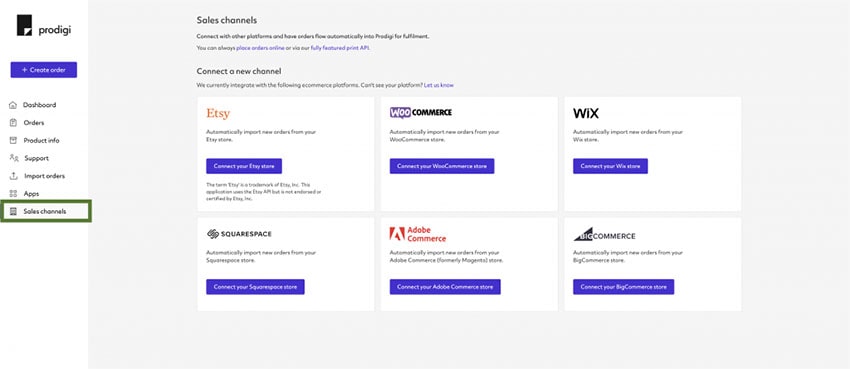
2- Select your desired sales channel
Decide on the sales channel or platform where you want to sell your products if you don’t have one already. Common options include Shopify, WooCommerce, Etsy, Amazon, etc.
3- Set Up an Account on the Sales Channel
If you don’t have an account on the chosen sales channel, create one. Follow the platform’s instructions for setting up your store.
4- Search for Prodigi Integration
Most sales channels have an app or integration marketplace. Look for Prodigi or check if Prodigi provides integration options for your chosen platform.
5- Install Prodigi App/Integration
Install the Prodigi app or integration on your sales channel platform. This is often done by navigating to the app store within the platform and following the installation instructions.
6- Configure Settings
Once the integration is installed, configure the settings according to your preferences. This may include linking your Prodigi account, specifying products, setting pricing, etc.
7- Sync Products
If your integration allows, sync your products between your sales channel and Prodigi. This ensures that product details, pricing, and availability are consistent.
8- Test the Integration
Perform a test by creating a sample order to ensure that the integration is working correctly. This helps you identify and resolve any issues before live transactions.
9- Set Up Payment and Shipping
Configure payment and shipping settings within your sales channel, ensuring that customers are charged accurately, and shipping information is communicated to Prodigi.
10- Launch Your Store
Once everything is set up and tested successfully, launch your online store. Your products will now be fulfilled by Prodigi, and orders will be automatically sent to them for processing.

“Success is not final, failure is not fatal: It is the courage to continue that counts.”
– Winston S. Churchill
Challenges when selling prints online
While Prodigi and other POD providers offer an easy-to-use interface for creatives to place a POD order, most of them don’t provide sellers with a store to list their products in. Sellers are always faced with (3) different options to sell their arts online:
- Build their own online store to sell art and connect it to a POD provider like Prodigi using their API to seamlessly receive orders and place them on Prodigi.
- Use a website builder with an ecommerce platform to build an online store such as Shopify, Wix or SquareSpace (read more here). Moreover, they have to connect that to a POD provider like Prodigi.
- Use a platform that is tailored for artists like Olasty, which connects to POD provider like Prodigi without having to manage the orders in multiple places or worrying about fulfilment.
Final thoughts
Establishing a thriving online business is entirely achievable with the right tools. Artists should prioritize their creative output and not be burdened by concerns such as inventory management, branding, invoicing, and fulfillment throughout the process of selling prints online.
What does Olasty provide to creatives
Olasty addresses a potential gap in this industry by offering a technological solution that allows creatives, such as artists and photographers, to delegate the sales process. This empowers them to concentrate on their true passion—creating art.
Essentially, Olasty facilitates the creation of well-branded online stores seamlessly integrated with Print-On-Demand (POD) providers, all without requiring any technical expertise.
Explore Olasty; your effortlessly integrated e-commerce store is just a few clicks away.
Focus on achieving your business goals, we will handle the technical side of things.
Olasty's goal is to make it easier for you to sell your art online. We provide you with the tools and technologies you need during your journy so you can add amazing features to your website with minmal cost and effort.